After lots of blood (literally, bloody fingers from sanding), sweat (it’s hot out in our garage!) and tears (you laugh, but yes, tears) painting the kitchen cabinets, they were DONE! And I said I was DONE with the kitchen. Jason said, “Yea right.” And it’s true, I am always “DONE,” but with one or two more things to do.
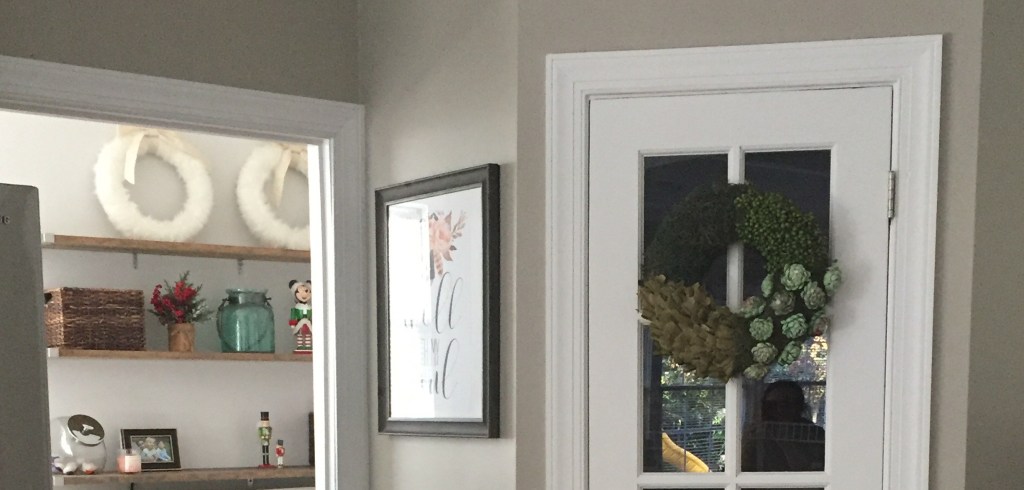
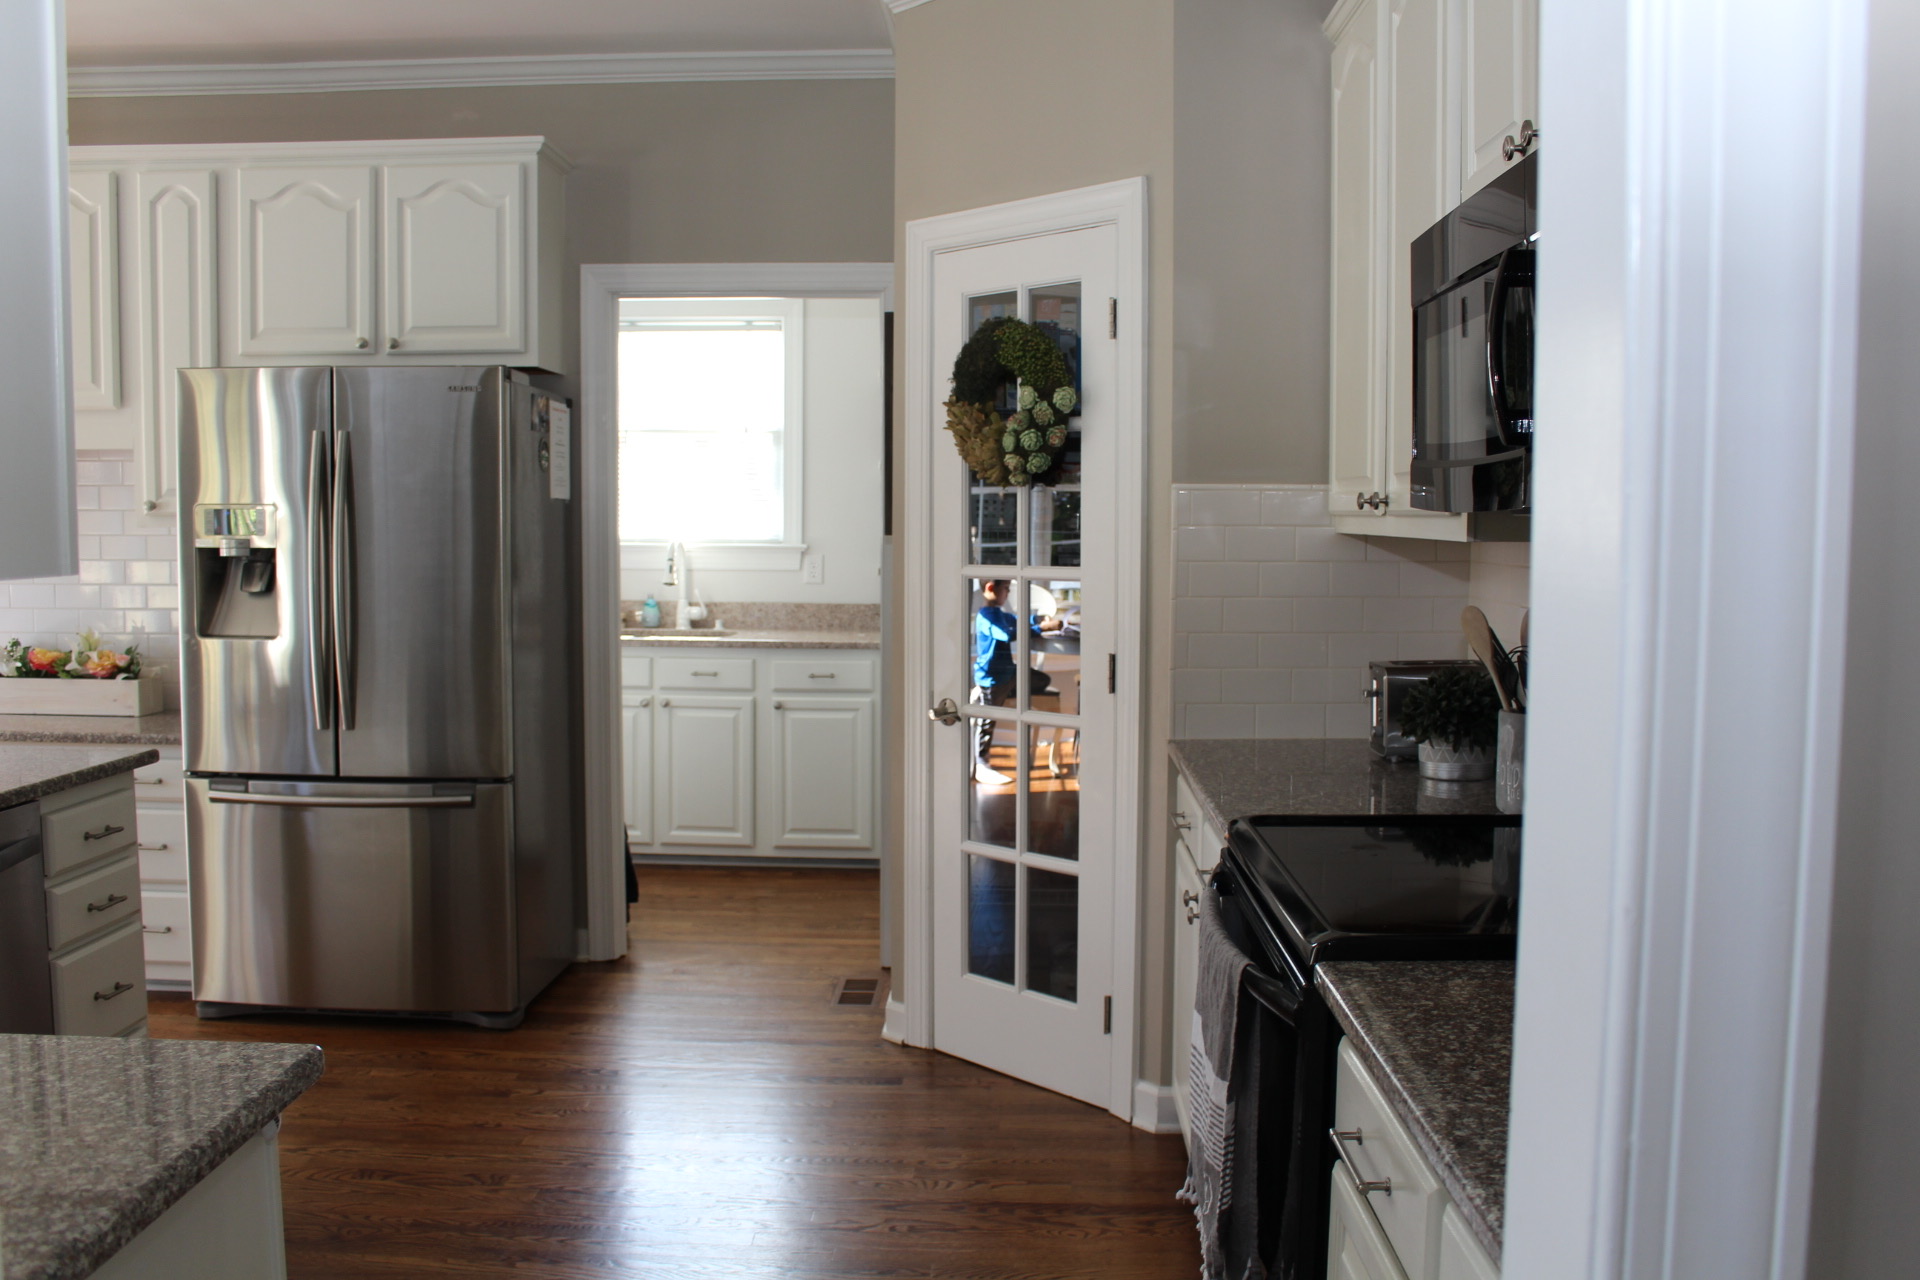
The next task to tackle was the pantry door. My dad had recently brought us some old french doors that a friend was getting rid of. So they were just sitting in the garage waiting to be used. How can you blame me, right? Jason came home and saw me standing mid-kitchen staring at the regular pantry door with that look. He was like, “Oh no, now what? I thought you were done?”. Haha. I went out into the garage, measured a french door and came back excited because the door sizes were the same. I thought it would be fun to swap out the door just for some added interest, but didn’t know how much of a difference it would make. Note: I keep a pretty clean pantry. Most of the time. Otherwise, I would not have considered a french door that exposes everything inside. Second note: Hanging a door is not for the faint of heart.
So we took the old door off the hinges, put the new one up and TA-DA! Just what I was wanting! Next I took off the splashguard from the wall (that’s the little piece that goes a few inches up the wall where the granite countertop meets the wall to hide any gaps). It was all throughout the kitchen and desk areas. I wasn’t sure how to remove this, and was a little afraid I’d damage the countertop, so I called a friend who does granite and he came over to help. In hindsight, I could have done it myself. It took him about 15 minutes and literally just popped off the wall. Once it was all removed, I knew what would come next.
That day, I started looking through blogs on how to do a tile backsplash. Though I’d never tried tile before, I decided I’d give it a go. For those of you who have never tiled before, this is a TOTALLY DOABLE job. Like, the easiest part of this kitchen reno BY FAR! If you know how to use a level and make a straight line, you can do this. I did almost all of my cuts with a tile snapper, but ended up renting a wet-saw from Home Depot (best $30 spent) to finish up the tricky pieces.
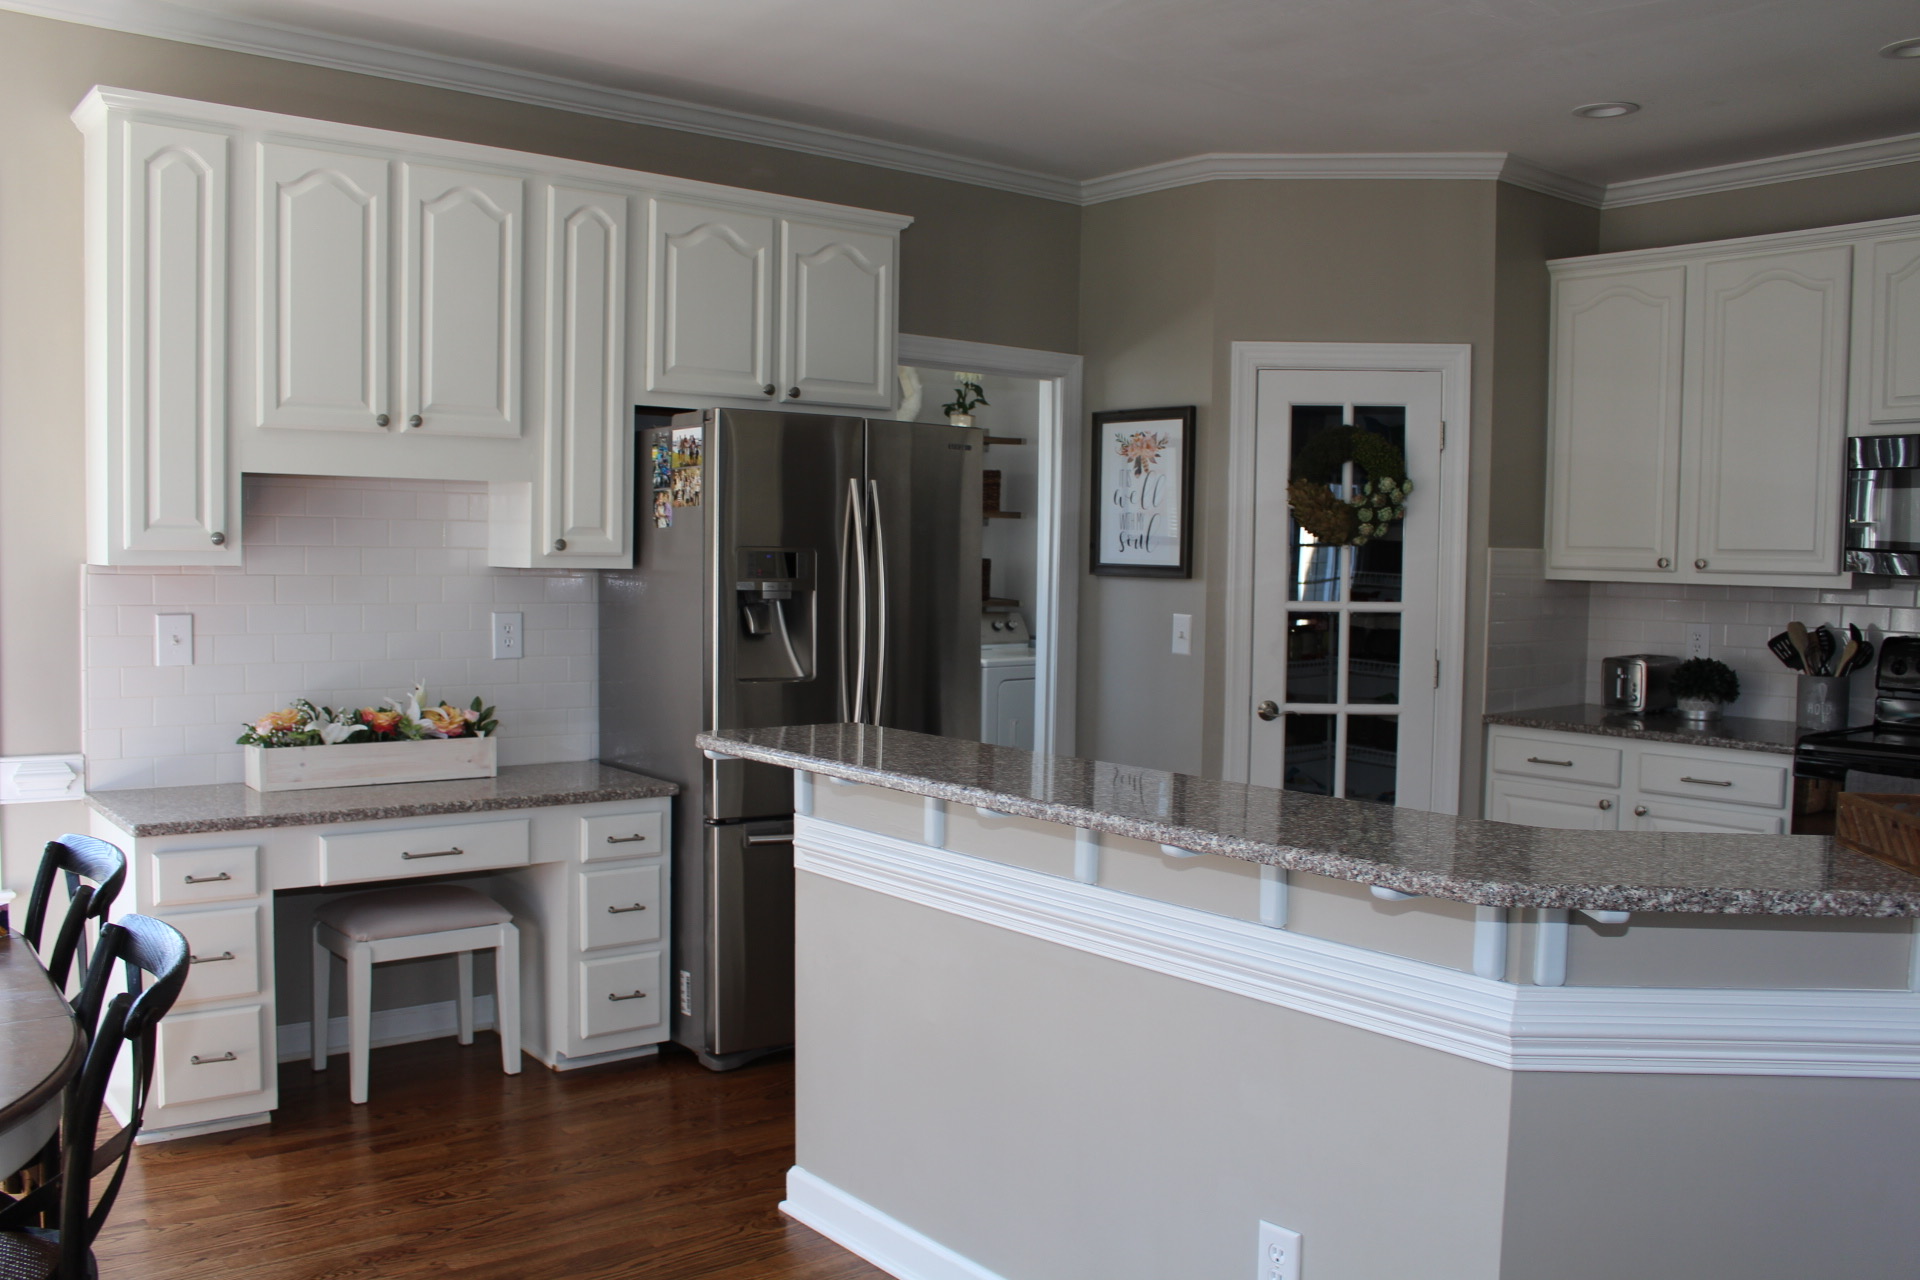
Overall, it probably took me a few nights after the kids went to bed and then a few hours to grout on Saturday. I used cheap, clearanced subway tile from Home Depot and spent $26 for all of the tile! That’s a serious bang for the buck!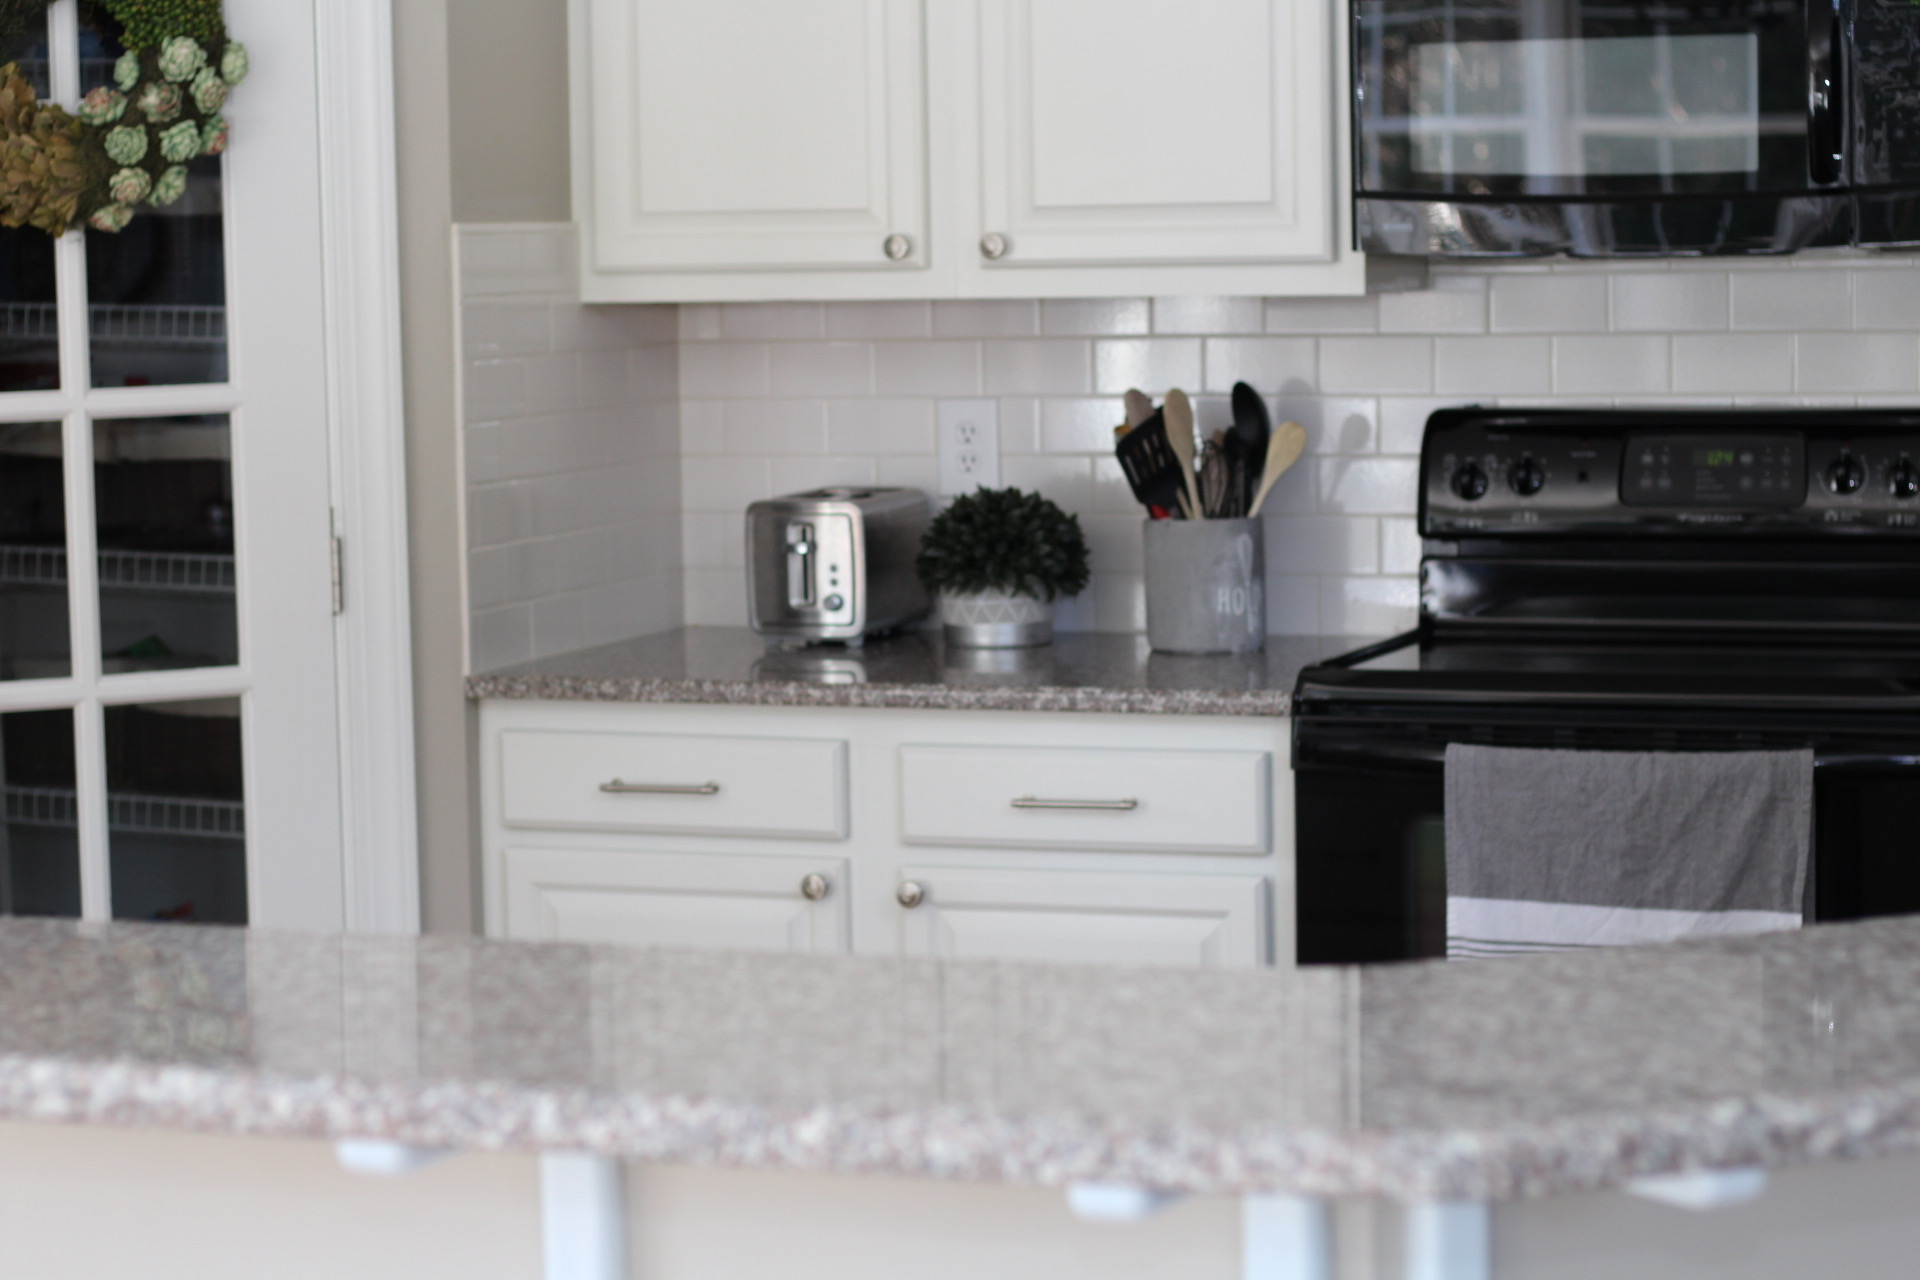 The last thing we did was add can lights to the ceiling. “We” meaning my dad. My parents (hi mom and dad!) came in town for Christmas and this was their Christmas present to us that year! We previously had a big wooden fluorescent boxed light, so this was a great gift. We put the new lights on dimmers so the lighting in the kitchen is variable with is a really nice touch.
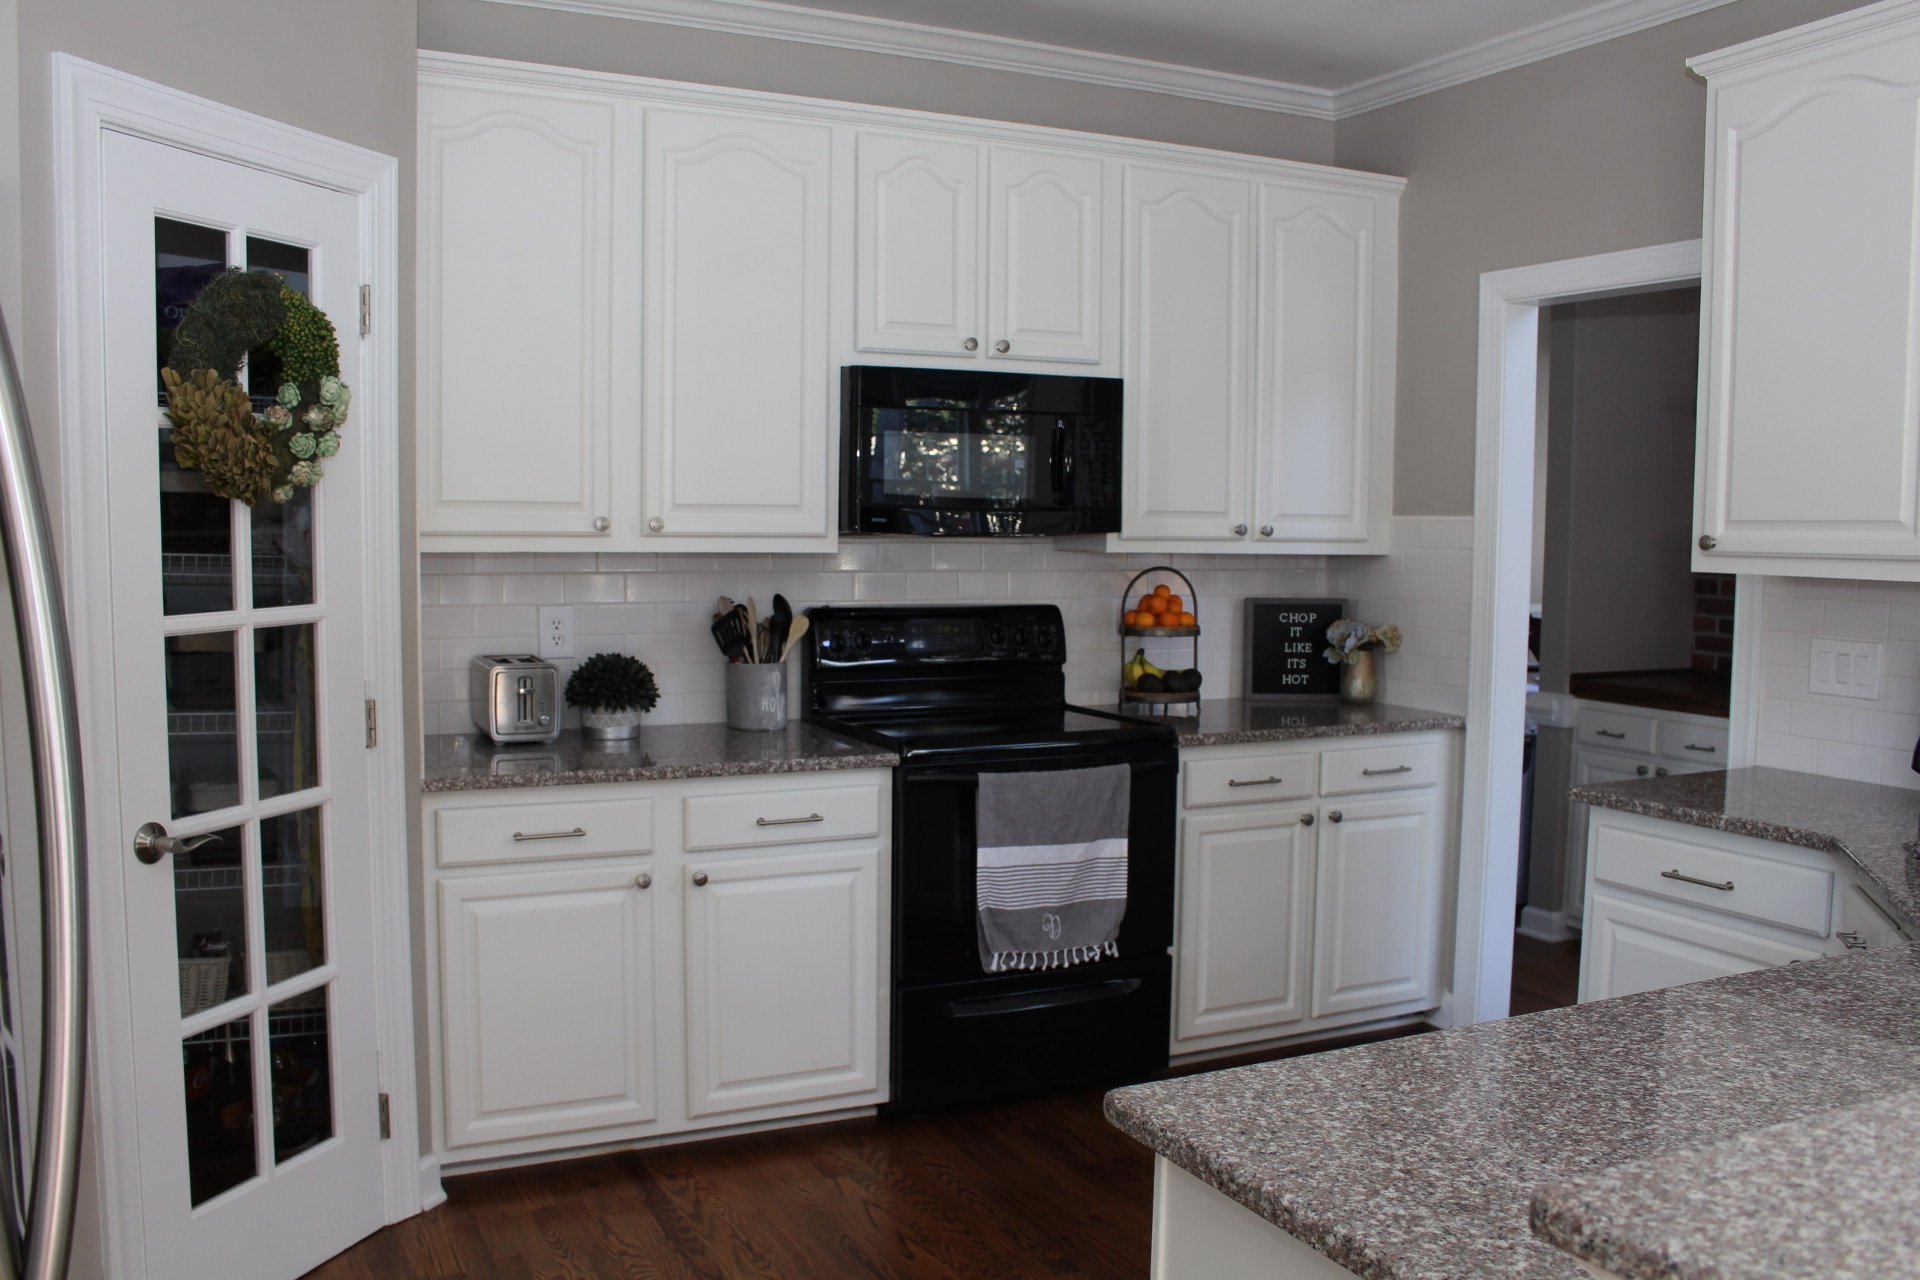
 After adding a few small decorations, the kitchen was finished. But for real finished this time. At least for now. So here is the kitchen in its full glory. But first…a quick reminder of how far we’ve come!


Check out before and afters of the entire house.
Don’t forget to visit The Shop!

Leave a comment