Welcome to the master bedroom! Unfortunately, I don’t have many great pictures of this room from when we moved in, but I did find this one.

There are so many things we loved about this bedroom.
First, it’s downstairs! I know this is not everyone’s preference (and we were actually unsure if we’d love it or hate it), but we have really liked it. When the kids go to bed, the whole first floor is ours. And there’s more privacy than our last house. If I had a newborn, I could see how that might be challenging. However, when we moved in, our youngest was 2 years old, so she was sleeping great and not needing attention all night.
Second, and I have already said this 10 times about this house, but ALL THE WINDOWS! There are 5 large windows, so there’s so much natural light.
When we bought the house, there was carpet in this room, but when we did hardwoods downstairs, we decided to carry them into our bedroom and are really glad we did. That alone made the room feel so much bigger.
When we first moved in, I painted the room and all the trim. I always say a coat of paint makes a room feel brand new. I used a really pale white and thought I’d love it. I mostly did. Honestly though, after staring at it for a few months, the room felt really cold to me. So I knew we wouldn’t keep it that color forever.
All the furniture from our other house fit great in here. I hung a big curtain rod and added some burlap curtains.
Really the only thing that I bought new for our bedroom at first was the bedding. We’d used the same duvet since we were married and it was time for an update. I found this online and fell in love with it. So, like usual, I watched it and watched it, waiting for it to go on sale. Well, it never did. So it was my big splurge and I have no regrets. It was (and still is!) one of my favorite things about our room.
Just these few changes really helped the room to feel more like “us.” 
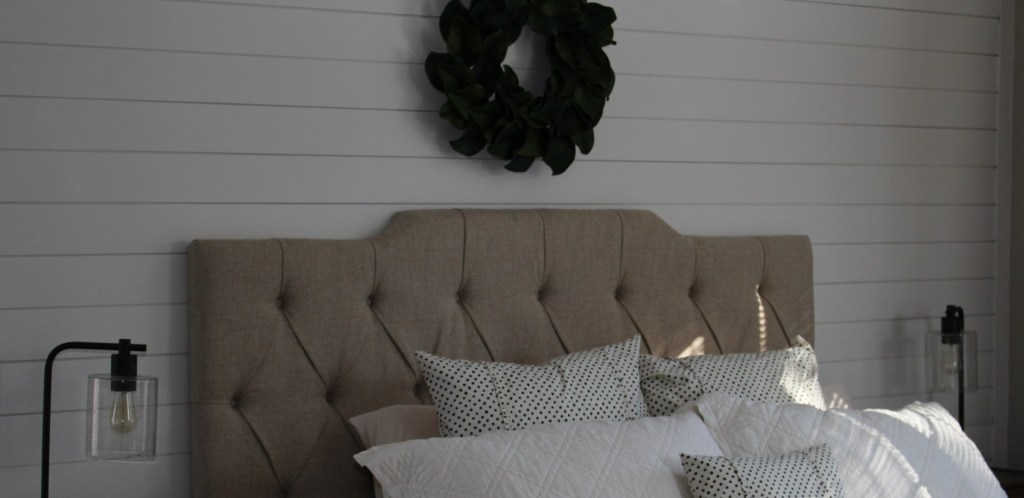
 I had been going round and round trying to think through what I wanted to do with the big wall behind the bed. What could you put there to give it some interest? Well, half way through our bathroom reno, as I was putting shiplap panels on the walls, I knew I had to do the same thing behind our bed. I know the normal person finishes one project before they begin another. But not me. I have a history of starting something, jumping to another, and another, then coming back. (well, usually coming back…;)) So I took a 2 day break and convinced Jason to help me shiplap the wall. The great thing is you can buy these single boards in 16 foot lengths, so I could nail them across the entire length of the wall with no seam. It also meant we needed to figure out a way to get a 16 foot board into the room. Picture 2 very late nights after kids were in bed, saw action going strong on the back porch, and feeding the piece of shiplap through the open window in the corner of the room. Also, picture both lamps getting knocked over and glass everywhere. Oooops.
The good thing with these boards is that they are tongue and groove so require no caulking because all the nail holes are covered. WAHOOOOO!!! We finished the shiplap, and although I would say it was a fairly easy job, it is most definitely a two-man job and requires some skill in going around windows, baseboards, ceiling, and other trim. I painted the shiplap over the next few days, and then moved everything back into place.
Next, I painted the walls Revere Pewter by Benjamin Moore and it feels so much warmer than it did with the white walls.
I sold a few things we had and replaced them with a few fresh pieces that fit the room better.
First, these nightstands (unfinished pine from Ikea) were $34.99! I grabbed 2 of them and used this site to help me finish them. I used stain I already had, trimmed out the drawers, and added cup pulls to the drawers. $35 well spent!


I also found this lamp at Target and bought two of them for the nightstands. (And I bought them BOTH TWICE. Because we broke them BOTH while hanging shiplap.)

I had these canvases in our dining room in the previous house. It was nice to find a space for them in our bedroom.

I also added a rug and a chair in the corner (found on clearance at Home Goods).
So, here’s the room. All finished. We really love it and are so happy with how it turned out. The only thing we have left is to replace the mini-blinds for something different, but for now, they stay. 🙂


Sources for bedroom :
- Headboard
- Burlap curtain panels
- My MOST FAVORITE bedding purchase ever I believe this is out of stock in king and queen size, but you can still find it in twin size.
- Ikea nightstands
- Bedside lamps
- Magnolia wreath Get it now! It’s on sale 50% off this week!
- Rug
- All canvas prints ordered from this site over the past few years. Keep an eye out. These go on crazy sale a bunch of times through the year!
Click here to see before and afters!

Leave a comment