The den is DONE! After about a month of planning and working, I’m happy to say the room is finished. What a job!
If you’re just joining in now, here’s a photo of what the room looked like when we first saw it. And then on closing day!

 We took out the carpet and continued hardwoods into this room when we moved in. I painted it Soji White, we moved the piano in, and then there it sat for almost 2 years.
The only time I’ve really liked this room is around Christmastime when I put a big tree in here, otherwise it’s been pretty boring. A few posts ago, I shared about my plans for this room. I am going to share pieces of the room today as it’s come together but you’ll have to stay tuned for the final pictures and details some time over the weekend!
I knew I wanted the chair rail to come down. I typically like chair rail, but with plans for built-ins and windows breaking it up anyway, I thought it would be best to take it down in this room.
I’ve watched my dad do this along with all of the patchwork that follows dozens of times, so I was willing to give it a go. Removing it also involved removing lots of caulk and paint and, in some cases, many coats of both! Hence the patching. So I scraped the wall with a putty knife, and then patched. Waited 24 hours and patched again. 3 times total. Then I sanded it all smooth and primed it. Then it was ready for paint! 

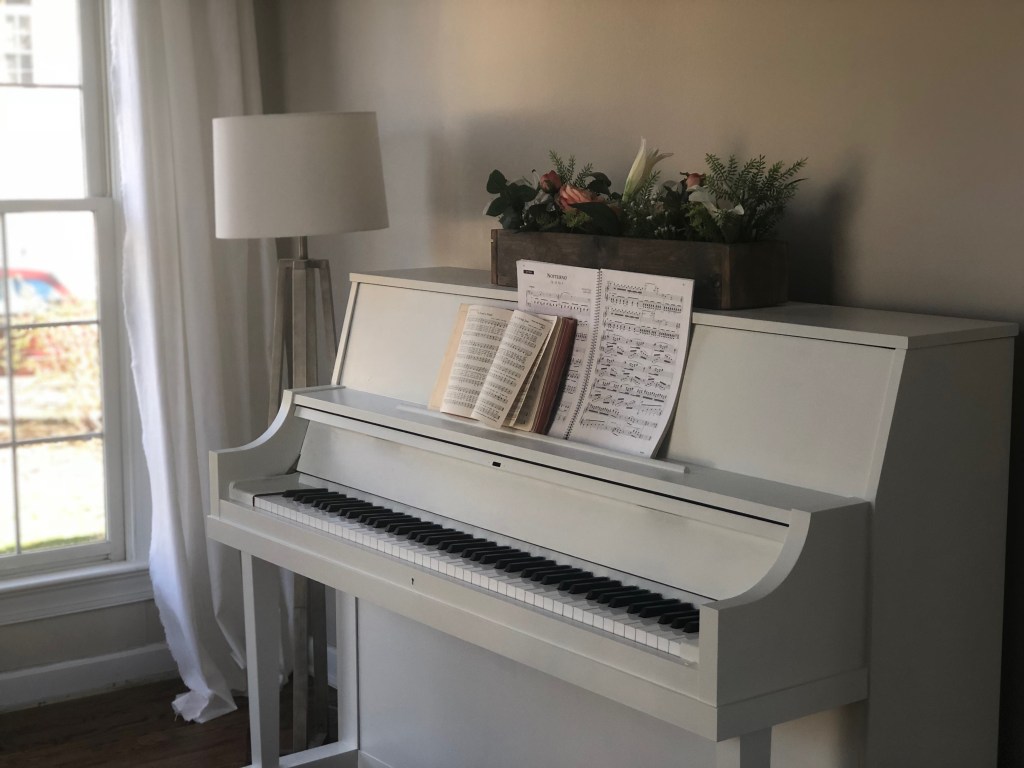
 Jason walked in the room one night and said, “Are you going to paint the piano next?”. Then he chuckled, like he was kidding. I wasn’t kidding. I had been dying to paint the piano for a few years, but it seemed pretty daunting and I was scared that I’d mess it up. With the help of one of my favorite blogs, I decided to give it a whirl. I primed it 3 times and then painted it 3 more times with the same cabinet coat paint we used to paint the cabinets in our kitchen. I used a small detail angled brush and a tiny roller. Worked like a charm. It wasn’t hard at all, but it took a good bit of time. And it was worth every minute! It makes such a huge difference in the room.

 A little added bonus – I redid the piano bench as well. I painted it white to match the piano, but it seemed so plain, so I took the hinged top off and replaced it with some pine planks that I stained.
 I found gold curtain rods for $9.99 at Home Goods (huge score!) and spray painted curtain rings gold to match.
After looking for some white curtains for a few weeks, I was having a time finding them in the length I needed. So, I ran to my favorite fabric store here in Raleigh, Mill Outlet Village, and grabbed some white linen fabric. With fabric you can sew the panels so that the final hem length is just right! These are nothing fancy, but fit the room perfectly.
I used inspiration from this desk and wound up building what I wanted for the room. The desk turned out even better than I was hoping for. Probably one of my favorite things in the space! The wood toned top is really beautiful and I like the simple black legs. I bought these chairs from Bed Bath and Beyond and it all ties together really nicely. I went back and forth with chairs facing the window or on the 2 ends. I love them like this. I can leave one side with my stuff set up for my Bible time in the morning, and the other side with my computer and calendar. Maybe I’ll even let Jason sit here sometimes if he’s lucky 🙂 The biggest job of all was the built-in cabinets. Here is the site I used to build these. I followed her exact instructions (she has a series of great posts with details for all of the steps). You should definitely read through if you are thinking about doing your own.
First, I had to remove the baseboards where the built-ins were going.
I bought 3 sets of these wall cabinets from Home Depot and built a base for them so they would be raised off of the ground. (I was lucky enough to get them on a 25% off sale!) I took doors off, primed and painted, and then added the hardware. After adding baseboard to the bottom, they look like they should have always been in this space. I went ahead and painted that back wall so I didn’t have to do that once the unit was in place. (the masking tape is marking the studs for when I install on the wall)


 I got some chunky, high quality pine from Home Depot and used that to do the countertop.
Once I added the countertop, I could think about assembling the built-in unit. Again, lots of steps. I figured out where I wanted all the shelves to go and built the primary unit. I used braces and supports to attach it to the wall on the sides and at the top. Then I played a little with some chalk lines and masking tape, trying to figure out shelf placement. Once I decided where I wanted them all to go, I installed all the braces for the shelves. Lots of leveling. Lots of measuring. Lots of checking and double checking to make sure everything was lining up correctly.
 Then I cut all the shelves down to size, nailed shelves into place, and attached all the trim work to the front. This made such a huge difference in buffing up the 1″ pine.
 Then I went MIA for a few days — I was in a caulking, painting, trimming, cutting-in fog. I caulked all the inside shelves to really make it look built-in. Then all shelves and braces needed 2 coats of primer on the tops and undersides. Then 2 coats of paint. Then cutting in with the wall color behind. I spent a few nap times jamming to the new JT album and working hard. (doesn’t good music always help time to pass faster?)
 I finished the shelves and then began my favorite part. Accessorizing. I had been picking up little things over the past few weeks and just putting them to the side, hoping they would work in the shelves. It was fun to take it all out and arrange and rearrange until I got it the way I wanted. Sorry, you’ll have to wait a few days to see the final thing. 🙂
I thought that I would want to close this room in eventually, and had some really great plans and ideas to do so, but now that it is done, I think I am going to leave it open. I really love all the light that comes into the front entry and stairs from this room. I did end up getting a contractor to come out and look at the decorative column that was at the base of the stairs. I know it was not a huge deal, and most people would never have even noticed, but I wanted it out. I checked it out myself and was 99.9% sure it was not load bearing, but had a contractor look at it just in case. He was 100% sure it could come out. So it did. In about 30 seconds. And I was left with some patching and painting. This is what you call a little thing that goes a long way. 
 The rest of the room had to be painted as well. I have done Amazing Grey (Sherwin Williams) in the entire downstairs main area. I wanted to do a little lighter for this room, so just went one shade up on the paint palette to Worldly Grey. (Side bar: all the greys in our house lean more towards the taupe side. It just fits our home better than a true grey.) The color looks great with all the light in the room and is enough of a contrast with the white shelving and trim.
Some other “quick fixes” — I took down all the trim work in the curved arch of the big window. If you scroll back through older pictures, you can see it. It took about 15 minutes and a little patching.
I also had to replace all the outlets. And not just the outlet covers. I had to turn off the power and rewire new outlets because when the room was painted before we moved in, so were the outlets. So with clean new walls, I couldn’t have 3 coats of paint on the outlets. Plus, a few of them had been painted a few times and the plugs wouldn’t fit. ![]()
The only thing this room still needs is some lighting. I have an old lamp in here for now, but some overhead light would be great to add. There is no lighting and no wiring for light in this room. WHY?!??!?! My dad is coming in April. So maybe soon…
The past few days I have been working on all the finishing touches. Things like painting all of the trim white, painting baseboards, cleaning paint splatters off the floor (oops), caulking missed nail holes, etc.
Give me a day or two to snap some “I’M FINISHED” pictures and I’ll let you know when the final post is up. Follow me on instagram or facebook for a heads up on that or just check back here soon!

Leave a comment