Well, it’s time to write about my most favorite room in the whole house! Our family room! We spend so much time in here and it has come a long way. When we were house-searching, this room was the really the main selling point. We wanted a big, open room and the windows and open second story in this space really accomplish that.
In order to appreciate what the room looks like now, you need some good shots of how far it has come. I wish I had taken more pictures before we started all of this. (I think I say this on every post. Haha. But I really do!)
This picture was from the second floor hallway looking down into the room. This was the view from the kitchen into the family room. There was a wall unit in that back right hand corner (worked and fit perfectly!) and the television was fixed on the mantel.
  These photos were taken the week before closing. The previous owners moved out early and graciously let me come in to do some painting upstairs before we closed. (WHAT A HUGE BLESSING!) So their things were mostly out at this point and ours were not in yet.
 This gives a better look at the flooring that was there and the big wall of windows. I’m not sure what I was drinking when I took these pictures — they are all crooked and sideways. 🙂
 This shot is from the hallway coming into the house from the front door. Walking into the family room, that back right corner is the breakfast area.
 We closed on a Friday morning and got right to work on floors (“we” meaning a floor company). There were pre-existing hardwoods in the foyer and the dining room. We wanted to continue them through the entire first floor (living room, family room, kitchen, laundry, and master bedroom). This was a job that was MOST DEFINITELY hired out. Any holy moly, these guys worked their tails off those first 48 hours. They ripped all the floors out and laid about 75% of the new floors in ONE DAY! It was a well-oiled-machine. They came back and finished laying floors most of Saturday, and then started sanding. Then they stained and put on a few coats of poly. The whole process took about 6 days. What a difference! I stood in the second story balcony one day and beamed with excitement!
We had a mix of red and white oak installed. Here’s a shot of them unstained. I chose provencial for the stain. Here’s a good picture of what they look like finished.
  Though the floors were a huge investment, they are my most favorite thing about the house! If you are in the market for new or refinished flooring, I HIGHLY recommend the company we used- C&N flooring here in Raleigh (ask for Norma).
This last shot is from the night before we moved in. We had a little pizza party on the finished floors in the middle of the room. Such a fun memory! We moved our stuff in and I thought I could live with the pink/orange paint on the bottom for a little while. That lasted about a week. Jason went to work one morning and came home to most of the family room painted. He thinks I am crazy. I agree. Jason told me I was not allowed to get on a ladder to paint the foyer or the open second story. He also said that he was not going to do it, so we ended up hiring out for that. 🙂 Otherwise, I am proud to say every other surface, and wall, and baseboard, and door has been painted by me! (No, I am not going to total those hours for you) I always say that a fresh coat of paint makes a room feel brand new and that really was the case here. It was also fun to see our furniture fit in here so much better than in our last house. The room is so open and even our dark, heavy leather couches didn’t seem so dark and heavy in here.

 The room stayed this way for a few months, but I had big plans in mind. From the first day I saw the house, I knew exactly what I wanted to do. Both sides of the fireplace had a large open space and I was envisioning some big, chunky, open shelves. So I started googling and searching images to find exactly what I wanted. Surely someone had done this before. Most of what I was finding was skinny shelves, or bookcases/built ins, but I knew that’s not what I wanted. And then one day I found this picture….

Beautiful, right? We’ll call this my “inspiration picture,” but really I copied it verbatim and just recreated what she did. When I found this image on Instagram I immediately started following her and saw a few more details/shots of this room she designed. (P.S. if you are interested, here is her Instagram account) So I took a mental snapshot, a snapshot on my phone, and immediately sent it to my dad and said, “So, when are you coming?”.
A few weeks later Jason had a 2-week trip planned to India, so mom and dad made plans to come keep me company. And help me with these shelves! 🙂
Insert: My dad. One of the most sacrificial men I know. The most hard working, professional, perfectionist you will ever meet. And he’s taught me everything I know about any of this. Almost every project I have done thus far has included a desperate Facetime call with things like, “What the heck do I do here?”, or “How do I get this pipe off of the old pipe?”, or “Uh oh, look what I just did…”. He can literally do anything and has a really patient way of talking me through even a confusing process (like changing out bathroom plumbing on Facetime…sorry for that 2 hour long phone call dad).
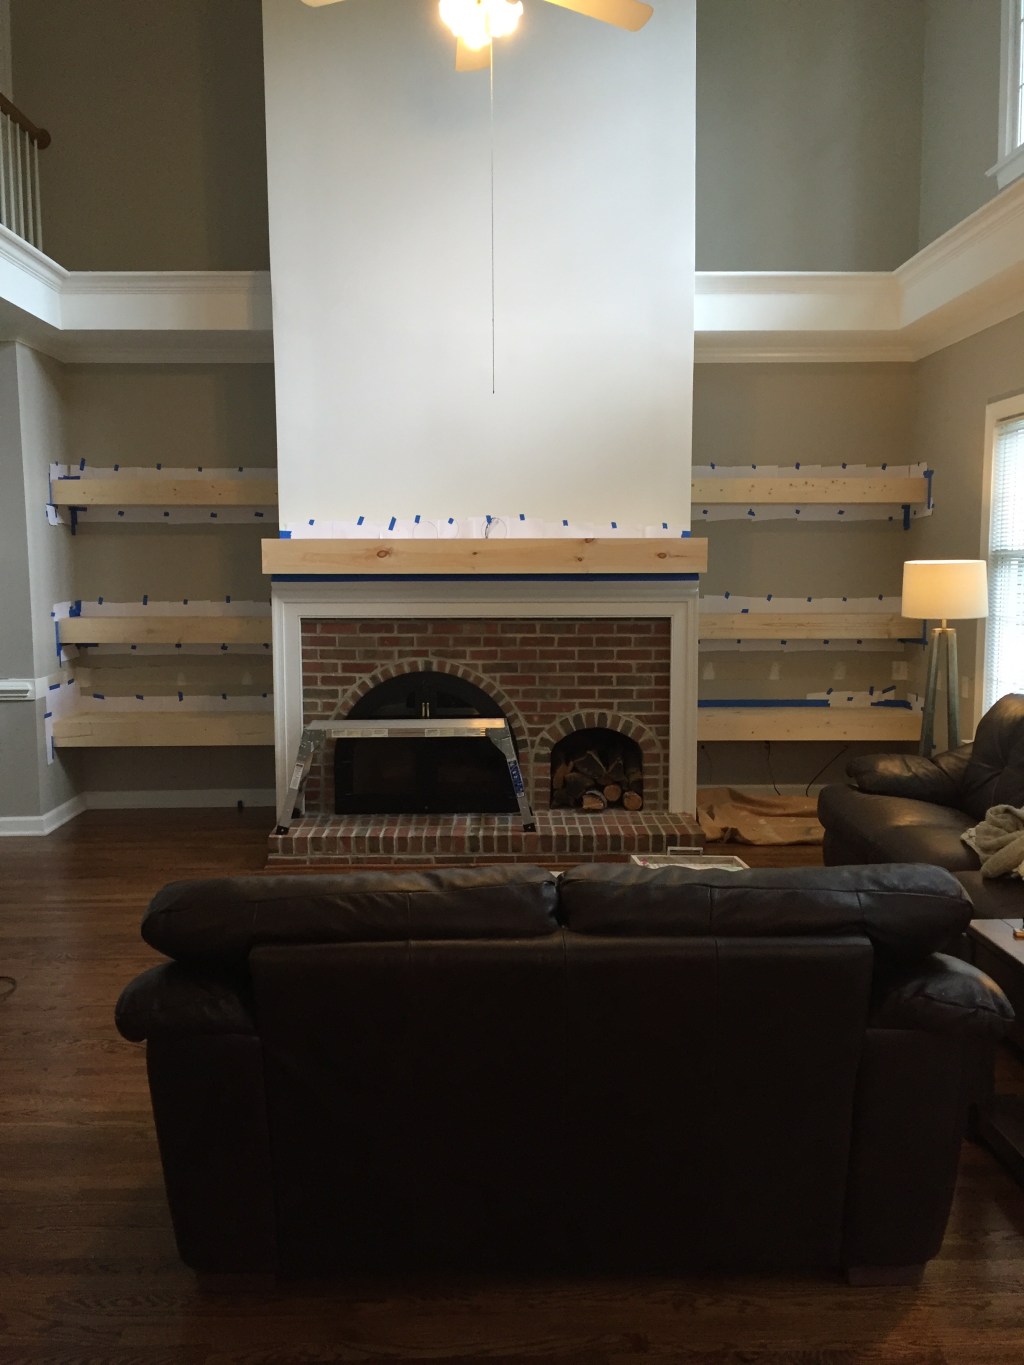
Let the shelf building begin! I usually follow someone else’s blog on how to do things, but not when dad’s around. Pretty much the way he builds is literally the best way it could be done. Like all of our children could stand and jump on these shelves and they would not budge 🙂 Once we got the shelves up, we decided the mantel needed to match. Dad took down the trim on the old mantel, and we built a new mantel right over it!
 Then I started staining. I started on the right hand side and worked pretty hard to get the exact color I wanted. I did a few coats of different colors, with a little light sanding in between. PERFECT! Now the hard part, trying to get the same color on the other shelves. Yikes. This was a lot harder than I thought. You can see in this photo that I started the mantel here, but it’s not yet the same as the sides.
 Here I got the color to match! Time for the left hand side…
 This process continued. After getting the shelves the color I wanted, I finished up with a few coast of poly to protect them.
I’m going to stop here for today and leave you hanging. Be on the lookout for the final family room post, full of shelf decor, and paint colors, and lots and lots of pictures 🙂

Leave a comment